Vocal Effects Chain using

Crafting a polished, professional vocal sound doesn’t have to feel mysterious or overwhelming. With the right effects chain—and a little guidance from the excellent Joe Gilder of Home Studio Corner https://www.youtube.com/homestudiocorner, you can transform raw recordings into mixes that shine. In this post, I’ll walk through my go-to vocal chain in Reaper using Linux-friendly plugins, showing you the exact steps and settings that consistently deliver clean, present, and expressive vocals.
First EQ
To lay down a solid foundation for the entire vocal chain, Joe recommends starting with the sequence EQ → Compression → Deesser → EQ → Compression. This order helps you clean up problem frequencies early, control dynamics, and then fine-tune the tone later on.
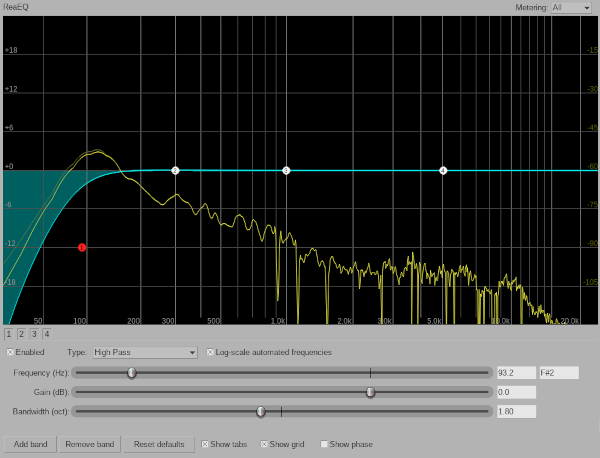
For the very first step, we apply a simple but extremely effective High Pass Filter at around 120 Hz. This removes rumble, plosives, and low-end energy that usually doesn’t belong in a lead vocal. Even if you can’t hear these frequencies clearly, cutting them out provides more headroom and sets up the compressors to work more efficiently.
| Action | Hz |
|---|---|
| High Pass | 120Hz |
First Compression
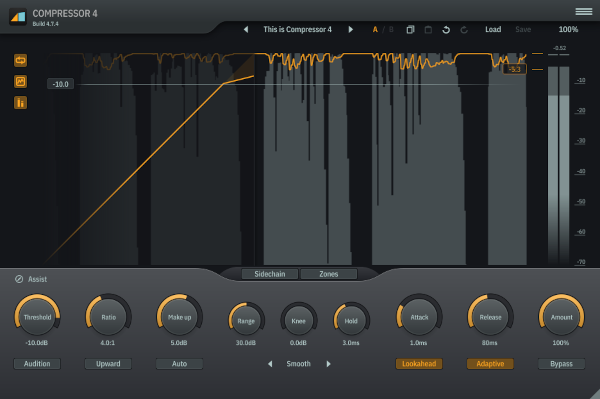
Once the vocal is cleaned up, it’s time to give it some dynamic control. This first compressor acts as a general “leveling” stage, smoothing out major peaks so the vocal sits more consistently in the mix.
A fast 1ms attack catches sharper transients, while an 80ms release lets the compression breathe naturally. The 4:1 ratio provides firm but musical control. Slowly pull the threshold down until you see around –9 dB of gain reduction on the louder phrases—this ensures the vocal stays present without sounding crushed. Then use the make-up gain to bring the output back up to around –1 dB, restoring perceived loudness.
| Setting | Values |
|---|---|
| Attack | 1ms |
| Release | 80ms |
| Ratio | 4:1 |
| Threashold | Turn down until main output is approx -9db |
| Make-up | Trun up unti main output back up to -1db |
Deesser
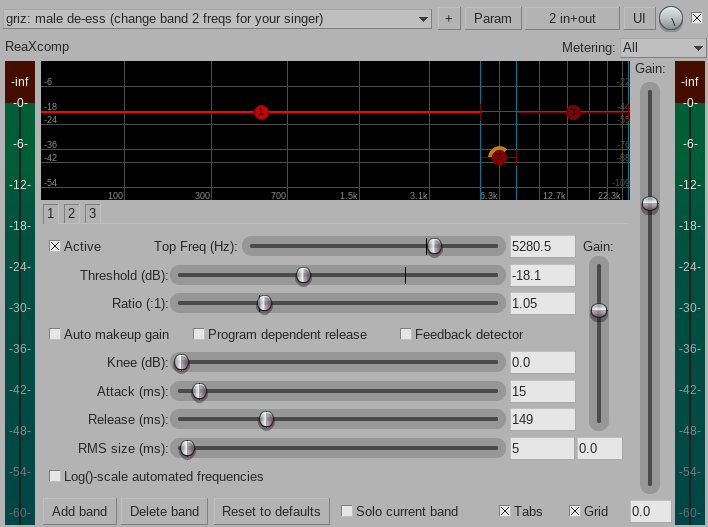
Sibilance—those sharp “s” and “t” sounds—can quickly ruin an otherwise great vocal mix if left untreated. This is where a deesser comes in. Finding a dedicated Linux-native deesser can be tricky, but thankfully several plugins include deessing functionality or presets.
Reaper’s ReaXComp works surprisingly well for this, especially when you zero in on the usual sibilant range (somewhere between 5 kHz and 9 kHz). ToneBoosters’ Compressor 4 includes its own deessing mode, and AirWindows’ minimalist DeEss plugin is a nice lightweight alternative. Whichever tool you choose, the goal is simple: tame those harsh consonants without dulling the overall brightness of the vocal.
Second EQ
With the vocal now smoothed and de-essed, we can shape the tone more creatively. This second EQ pass is all about enhancing the character and presence of the recording.
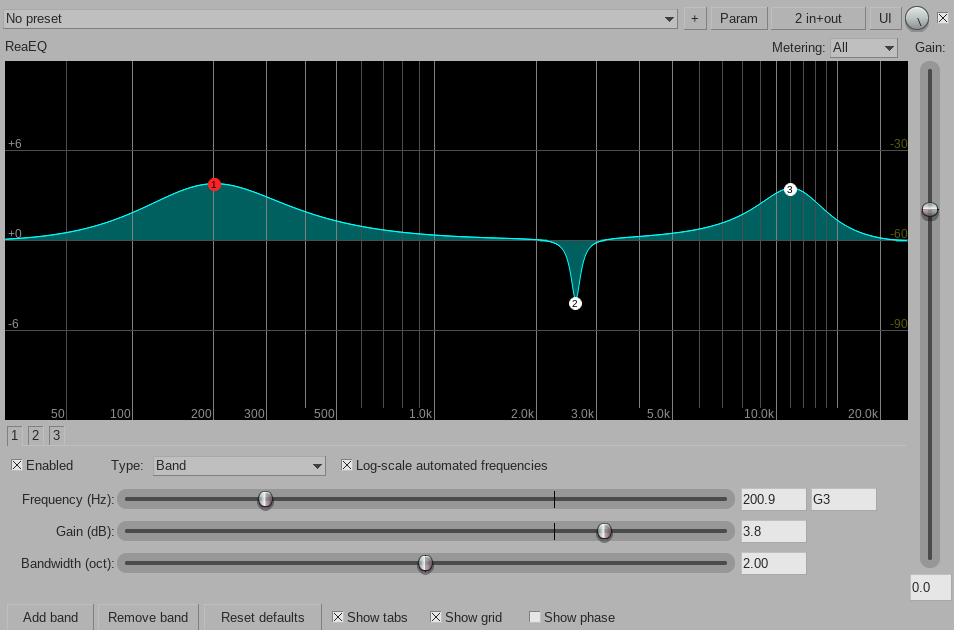
A gentle boost around 200 Hz adds warmth and fullness, helping a thin vocal feel more solid. A narrow cut between 2300–2900 Hz targets the “nasal” or “boxy” resonance that many microphones accentuate. Finally, a high-frequency boost around 11 kHz adds air and sparkle, giving the vocal that polished, open sound that cuts through the mix beautifully.
| Action | Hz |
|---|---|
| Boost | 200Hz |
| Narrow Cut | 2300-2900Hz |
| Boost | 11000Hz |
2nd Compressor
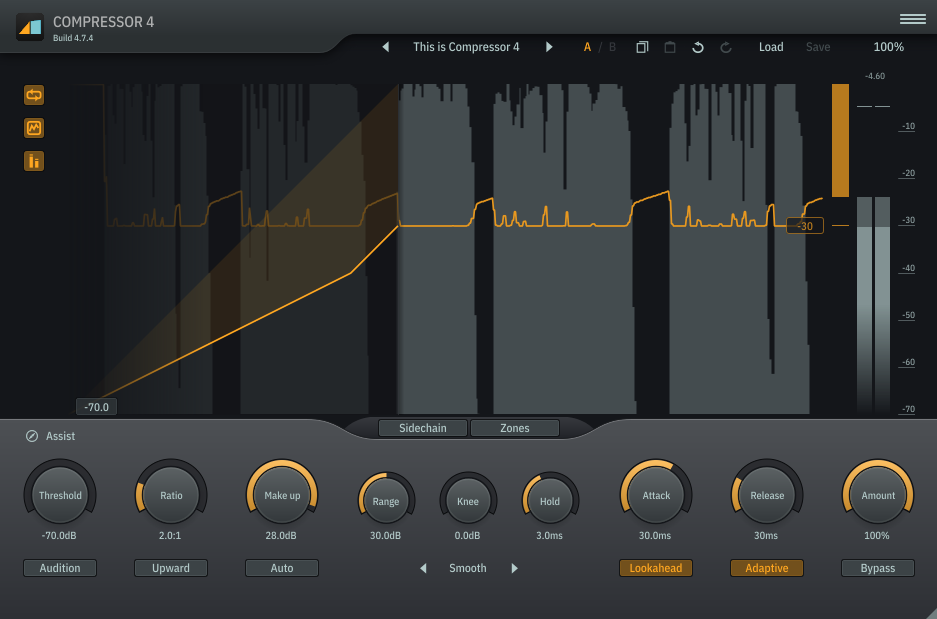
The final compressor glues everything together and adds the finishing touch of polish. Unlike the first compressor, this one uses a slower 30 ms attack, which allows the initial transients to pass through and keeps the vocal feeling lively. The 30 ms release maintains a natural response.
Pull the threshold all the way down so the compressor is constantly engaged, then gradually raise the ratio until you see about 5 dB of gain reduction. This gives the vocal a controlled, radio-ready consistency. Finally, adjust the makeup gain to bring the level back up to around –1 to –3 dB, ensuring it sits confidently in the mix.
| Setting | Values |
|---|---|
| Attack | 30ms |
| Release | 30ms |
| Threashold | All the way down |
| Ratio | Turn up until main output back up to -1-3db |
Conclusion
This vocal effects chain provides a reliable, well-tested starting point for achieving clear, controlled, and polished vocals—especially if you’re working in Reaper with Linux-friendly plugins. But it’s important to remember that every voice, microphone, and musical context is different. Think of this chain not as a strict recipe, but as a flexible framework you can tweak, refine, and adapt as your ears and mixing skills continue to grow. Experiment, trust your taste, and let this serve as a solid foundation for developing your own signature vocal sound.